Underground drain pipes are a critical component of your plumbing system, carrying waste and water away from your home or business. Over time, these pipes can suffer from various issues such as tree root intrusion, soil movement, corrosion, or general wear and tear. Addressing these problems promptly is essential to prevent extensive damage, high repair costs, and significant inconvenience. This comprehensive guide will walk you through the steps involved in repairing an underground drain pipe, utilizing safe, fast, and efficient techniques. At Pro Drain Techs, we pride ourselves on providing top-notch service, ensuring your plumbing system is always in excellent condition.
How to Repair an Underground Drain Pipe

1. Identifying the Problem
The first step in repairing an underground drain pipe is accurately identifying the problem. Modern diagnostic tools, such as camera inspections, are invaluable for this purpose. By inserting a small, flexible camera into the drain, you can get a clear view of the pipe’s interior. This non-invasive method allows you to pinpoint the exact location and nature of the damage, whether it be cracks, blockages, or root intrusion. A camera inspection saves time and avoids unnecessary digging, making the repair process more efficient and less disruptive.
2. Locating the Damaged Pipe
Understanding the layout of your sewer lines is crucial when locating the damaged pipe. Using pipe locating equipment, you can trace the path of the pipes underground. This equipment sends signals through the pipes, which can be detected above ground, helping you accurately locate the damaged section. Knowing the precise location of the damage allows for targeted excavation, reducing the amount of digging required and minimizing disruption to your property.
3. Preparing for the Repair
Before starting any repair work, it’s important to turn off the water supply. This step is crucial to prevent further damage and ensure a safe working environment. Locate the main water shut-off valve and turn it off completely. Additionally, gather all necessary tools and materials, including safety gear, to prepare for the excavation and repair process. Ensuring you have everything you need beforehand can save time and reduce the risk of complications during the repair.
4. Excavation Process
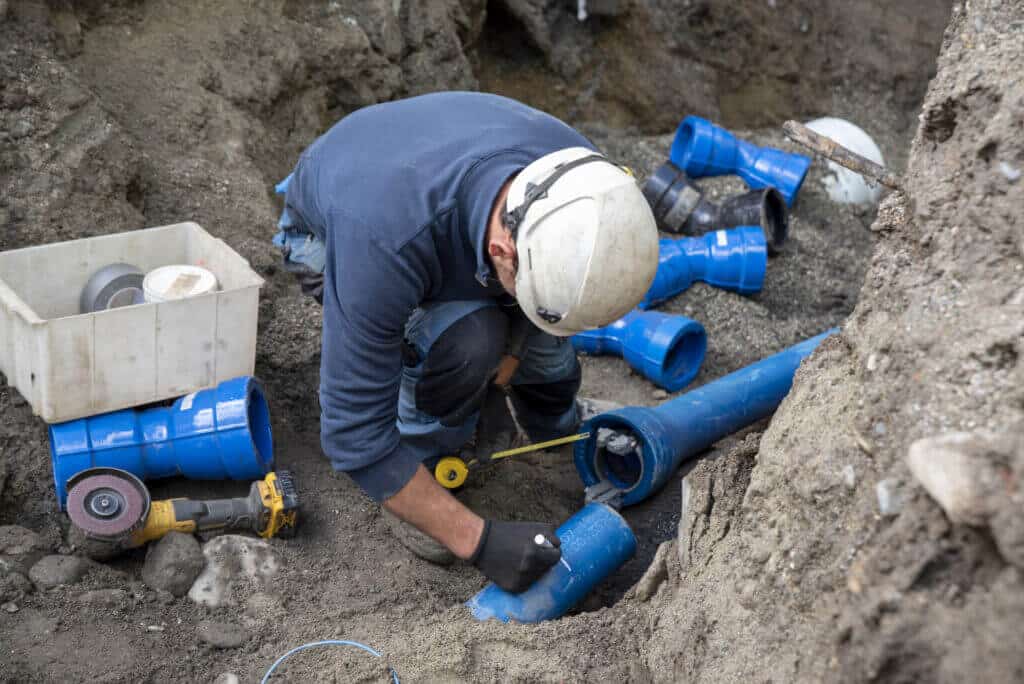
With the water supply turned off and the damaged pipe located, the next step is to excavate the area around the pipe. Use appropriate tools and equipment for safe and efficient digging. Follow safety precautions to avoid damaging other utilities and ensure the excavation is done properly. Depending on the depth and location of the pipe, you may need shovels, digging bars, or even heavy machinery. Always take care to dig carefully and avoid causing additional damage to the surrounding area.
5. Repairing the Pipe
Cutting Through the Pipe
Once the damaged pipe is exposed, you will need to cut through the damaged section. Use a pipe cutter or saw to carefully cut through the pipe. Always wear safety gear, such as gloves and safety glasses, and follow proper techniques to ensure a clean cut. The quality of the cut is important to ensure a secure fit for the new pipe section and to prevent leaks.
Measuring and Cutting a New Pipe Section
Measure the length of the damaged section you removed and cut a new piece of pipe to match. Ensure that the new section fits perfectly to avoid any leaks or misalignments. Use a measuring tape for accurate measurements and mark the pipe before cutting. Once the new section is cut, deburr the edges to remove any rough spots that could impede a proper fit.
Pipe Relining
Alternatively, you can consider pipe relining, a method where a flexible lining is inserted into the damaged drains. This lining is coated with a resin that hardens, creating a new pipe within the old one. Pipe relining is less invasive and can be a faster solution compared to traditional pipe replacement. This method is especially useful for pipes that are difficult to access or in areas where excavation is not feasible.

6. Installing the New Pipe
With the new pipe section ready, it’s time to install it. Fit the new piece into the existing pipe, ensuring proper alignment and sealing. Use appropriate connectors and sealing materials to secure the new section and prevent leaks. Tighten all connections properly and ensure that the new section is firmly in place. Double-check all fittings and connections to avoid any potential issues once the water supply is turned back on.
7. Final Steps
Refill the Hole
After the new pipe is installed, carefully refill the excavation site. Make sure to compact the soil properly to avoid future settling, which can cause additional issues. Use a tamper or other compaction tools to ensure the soil is packed tightly. Properly refilling the hole not only stabilizes the ground but also helps to protect the new pipe from damage.
8. Post-Repair Considerations
Camera Inspection
Conduct a final camera inspection to ensure the repair is successful. This step verifies the integrity of the new pipe and confirms that the issue has been resolved. A post-repair inspection ensures that there are no remaining issues and that the pipe is functioning correctly. It’s a critical step to provide peace of mind and guarantee the quality of the repair.
Regular Maintenance
To prevent future problems, schedule regular maintenance and inspections of your underground drain pipes. Regular check-ups can help identify potential issues early and keep your plumbing system in top condition. Consider setting up a maintenance plan with a professional plumbing service to ensure your system is regularly monitored and maintained.
Conclusion
Repairing an underground drain pipe involves several critical steps, from identifying the problem to conducting a final inspection. While some homeowners may attempt DIY repairs, it’s often best to seek professional help for complex issues. At Pro Drain Techs, we pride ourselves on delivering safe, fast, and efficient services. Our experienced staff uses the latest diagnostic tools and techniques to ensure your plumbing system is in top condition. If you’re facing any issues with your drain pipes, don’t hesitate to contact us for reliable and trustworthy assistance. We are committed to your 100% satisfaction and will do whatever it takes to ensure your plumbing problems are resolved efficiently and effectively.
