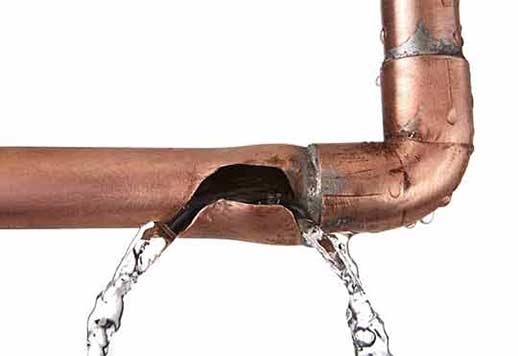
A burst copper pipe can quickly escalate from a minor inconvenience to a major problem if not addressed promptly. Knowing how to repair it effectively can save you time, money, and potential water damage to your property. In this guide, we’ll take you through the step-by-step process of repairing a burst copper pipe, equipping you with the knowledge to tackle this common household issue with confidence.

How to Repair a Burst Copper Pipe
When dealing with a burst copper pipe, immediate action is crucial to prevent water damage and restore your plumbing system to full functionality. Before you begin, ensure you have the necessary tools and materials ready for the repair process. These typically include a pipe cutter, replacement fittings, soldering equipment, and safety gear such as gloves and goggles.
- Shut Off the Water Supply
The first step in repairing a burst copper pipe is to shut off the water supply to prevent further leakage. Locate your home’s main water valve and turn it off clockwise until it stops. This will cut off the flow of water to the entire house, ensuring a dry work area for the repair. - Drain the Pipes
With the water supply shut off, drain any remaining water from the pipes by opening faucets at the lowest and highest points of your plumbing system. This will relieve pressure and minimize the amount of water that may leak during the repair. - Identify the Burst Location
Carefully inspect your plumbing system to identify the exact location of the burst copper pipe. Look for signs of water stains, puddles, or dripping water. Once located, mark the damaged area to prepare for repair. - Prepare the Pipe
Before cutting out the damaged section, ensure the surrounding area of the pipe is clean and dry. Use a pipe cleaner or emery cloth to remove any corrosion or debris from the pipe surface. This step is crucial for achieving a strong and secure soldered joint. - Cut Out the Damaged Section
Using a pipe cutter, carefully cut out the damaged section of the copper pipe. Measure the length of the removed segment to determine the size of the replacement fitting needed. Ensure the cuts are clean and straight for a proper fit. - Prepare the Replacement Fitting
Clean the ends of the remaining pipe and the replacement fitting thoroughly with a pipe cleaner or emery cloth. Apply flux to the cleaned surfaces to promote solder adhesion and prevent oxidation during the soldering process. - Solder the New Fitting
Position the replacement fitting over the prepared ends of the copper pipe. Heat the joint evenly with a propane torch until the flux begins to bubble and the copper turns a cherry-red color. Apply solder to the heated joint, allowing it to flow evenly around the seam. Ensure the entire joint is securely soldered and free from gaps. - Cool and Inspect
Allow the soldered joint to cool naturally. Once cooled, inspect the repair carefully for any signs of leaks or weak spots. Use a dry cloth to wipe away excess flux and solder residue from the pipe. - Turn On the Water and Test
Once satisfied with the repair, slowly turn on the main water valve to restore water flow to your home. Monitor the repaired section closely for any signs of leakage. If leaks are detected, turn off the water supply immediately and re-solder the joint as needed.
Final Inspection
After successfully restoring water flow and verifying the integrity of the repair, conduct a final inspection of your entire plumbing system. Check for any other potential issues or areas that may require maintenance to prevent future leaks.
Alternative Methods and Considerations
If you’re uncomfortable with soldering or prefer a temporary solution, consider using pipe clamps or epoxy putty to patch small leaks temporarily. However, these methods should be seen as temporary fixes until a permanent repair can be made.
Preventative Maintenance
To reduce the risk of future pipe bursts, implement regular maintenance practices such as inspecting pipes for signs of corrosion, ensuring adequate insulation in colder climates, and promptly addressing any plumbing issues.
Conclusion
Repairing a burst copper pipe requires careful preparation, attention to detail, and the right tools. By following these step-by-step instructions, you can effectively repair a burst copper pipe and restore your plumbing system without the need for extensive professional assistance. Remember, safety is paramount when working with plumbing and soldering equipment. If you’re unsure or uncomfortable with the repair process, don’t hesitate to seek assistance from a qualified plumber.
